Showing posts with label clothes. Show all posts

Saturday, February 25, 2012

Too Short Shirt to Dress


Good Afternoon, it is Jennifer. I am here to share a recent transformation I did for little Cupcake.

I ran across a tutorial on Make It and Love It, a blog I follow and love, on how to repurpose a shirt into a dress and decided I really needed to try it out! The dress she made was just way too cute and I couldn't resist. I found a shirt in Cupcake's closet that fit, but was just a little too short. I wish I would have taken a before picture, but I totally forgot. I had some fabric my Mom picked up for me (thanks Mom!) at Tuesday Morning, of all places, that I hadn't found a use for yet. I took a look, and thought it would match perfectly with her too-short shirt.

Looking super cool in her shades and new dress

Ashley's tutorial was great! It was easy to follow and provided lots of pictures that helped guide me through the process. She even taught me what a french seam was and how easy it was to do! I did struggle a little with getting the pleats right - I am not experienced when it comes to pleats. Because I struggled with the pleats, I changed how I attached the skirt to the shirt. Ashley's tutorial directs you to sew the skirt wrong side to the right side of the shirt, allowing the top of the pretty pleats you made show. It looks super cute on Ashley's version, but I realized mine would not look that cute. My pleats were not as pretty. So, I attached the skirt right sides together instead. I also decided to have the sash tie on the side, rather than the back, just for fun.

Perfect twirling skirt!

And that was it. A too-short shirt, transformed into a super cute dress! The first time I put it on my little darling, she said, "I look pretty in mine dress." Yes darling you do look very pretty :-)
Showing of the back
She insisted on wearing her necklace with the new dress


Wednesday, August 24, 2011

Fun Baby Projects

A friend and former co-worker of mine is going to have a baby soon and I was excited to create some homemade baby items as a gift for her and her cute little bundle of joy!

After browsing my favorite blogs and Pinterest I decided on embellishing some onesies and creating some cute burp rags. I found a great series on the Handmade Baby Clothes website called Embellish Your Onesie. It had so many ideas on how to fancy up a plain onesies! There were so many cute ideas, I had a hard time choosing, but I finally did. I picked up a pack of white onesies from Target and went with the applique, ruffle butt, inspired, and heart stamp ideas. Some of you who are familiar with onesie packs, yes you are right, they do usually come in a 5 pack. I tried to create the button-down one but messed it up and couldn't figure out a way to fix it so I just tossed it aside. I was really happy with how they turned out, check them out!

Ruffle Butt, Inspired, Heart Stamp, & Applique
Ruffle Butt
Inspired

Heart Stamped (with buttons for the centers)


Front and Back of the Applique onesie. I used the same fabric I used for some of the burp rags!

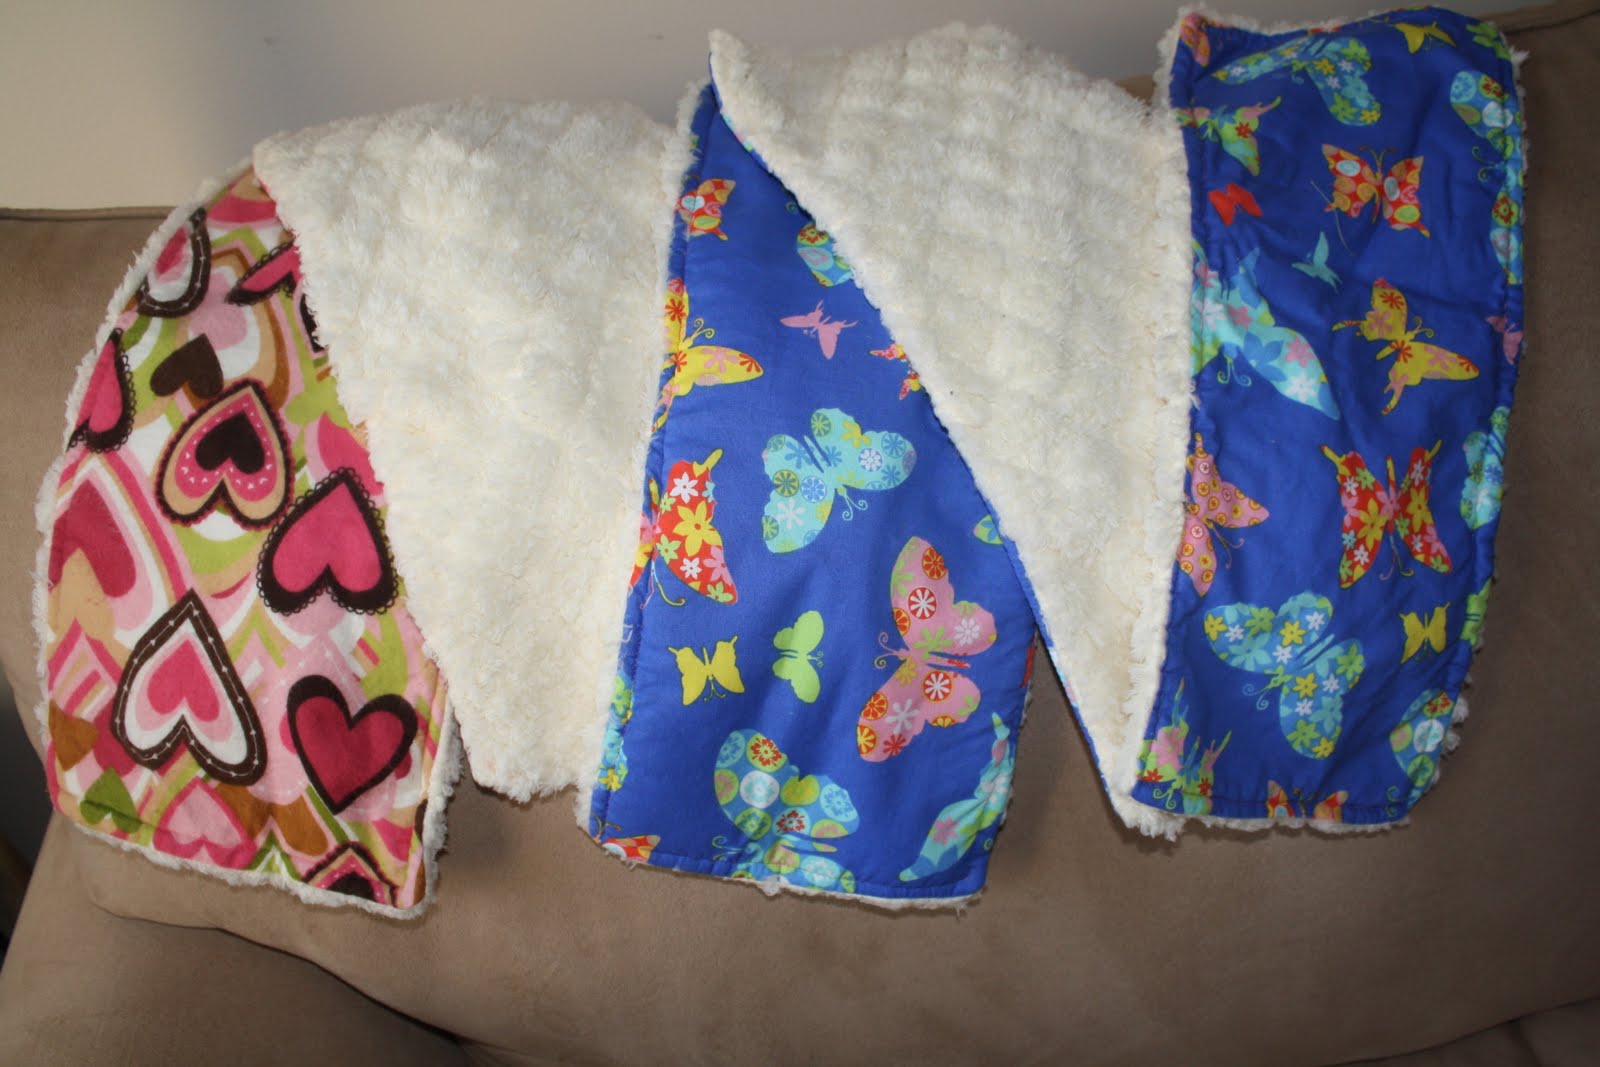
I then moved on to creating the Burp Rags. I used a butterfly fabric since that was the theme of the baby's nursery. I also used a soft cuddly fleece fabric with hearts, because who doesn't like hearts for a little baby girl? I used the tutorial I found on Craftaholics Anonymous. The description was that they were "super duper easy," and after looking at the tutorial, they definitely seemed super duper easy, so I was ready to go for it! I used some soft cuddly fabric for the back to catch all of that yummy spit up and drool the sweet baby will get all over them.


I was happy with all these cute baby items I created, but then I was browsing Pinterest again and came across this little cutie! I saw that it was an item on Etsy, not a tutorial, but after studying it I figured I could create it myself! After about a half an hour, I created my last little baby treasure.

With the links, I added it the front of the gift bag. Such a cute addition!

What are your go-to homemade baby gift items?

Tuesday, June 21, 2011

Fun Summer Clothes

Good Evening, Jennifer here to share some fun summer clothes I've been working on.

First, I'll start with the Prudent Baby Snappy Toddler Top/Dress. I have to start by pointing out that Prudent Baby is a fantastic site! I love it! I love everything they offer. They offer tons of different DIY ideas for "small fries," including free tutorials and downloadable patterns. I loved the Snappy Toddler Top and knew I had to try it out. I didn't have snaps on hands so I ended up using buttons. This was my first time I tried using the button-maker hole feature on my machine and, with some coaching from Mama Sara, I figured it out! It was fun to just press a button and watch my machine work its magic. The first one I created was out of some fun fabric I found at Jo Ann fabrics and turned out pretty well. It definitely took me a lot of time and there was some frustration here and there, working everything out, but I am so glad I stuck with it. I loved how it turned out!

Don't mind the wrinkles I didn't iron out before I took this picture!
I was so happy how this top turned out that I used every last bit of this fabric I had left, and made a bigger version! I gave the smaller version to a friend for her daughter's first birthday and kept the larger one for little Cupcake.

Such a great little model I have!
After I completed these two tops, I was still pretty obsessed with the Snappy Toddler Top and wanted to try the dress version. I used some more fabric I found at Jo Ann that I was so excited about. I bought the fabric not knowing what I wanted to do with it, but once I was able to get this top down I knew I wanted to make this dress out of it. I used some orange bias tape to finish the hem and the arms and was a bit nervous about this process. I had used bias tape before but never felt like I really got the hang of it and kind of dreading the idea of bias tape. I took a look at this fantastic tutorial from Smashed Peas and Carrots and it finally all made sense to me! Once I figured it out and was able to use it on this project, I fell in love with bias tape! It isn't as hard as I made it out to be and it is so cute! So thank you Maggie!

Cupcake in her new dress. She wasn't really feeling the modelling session.
I made it a little shorter than I would've liked, but it looked cute with some bloomers underneath.
Lastly, I created another project for my friend's daughter. This dress was the same as the Feeling Groovy Dress that I made for Cupcake. I finished it up by making a matching hair clip, again, using Jess' Poofy Fabric Flower tutorial (I told you I was obsessed with them!). Here is the final product:

Matching hair clip
Happy 1st Birthday Quinn - I hope she enjoyed the homemade goodness (I also gave her the hooded towel we made) I sure enjoyed creating them!

I'm currently working on 4th of July shirts for Cupcake and her two cousins based on a great tutorial from Make It and Love It, another fabulous blog! Can't wait to share.

Wednesday, May 11, 2011

Feeling Groovy Dress

I am SO in love with the newest dress I made for Cupcake! I just named it the Feeling Groovy Dress :-)


I stumbled upon Shanna's blog Celebrate the Madness and got super excited when I read she was doing a Dress a Day in May series! I instantly added her blog to my Google Reader and happily awaited her daily dress tutorials. One of the tutorials was the 10 Minute Twofer! It reminded me of the Ice Cream Social dress I created and blogged about earlier. After examining the tutorial in depth, I realized it basically was the Ice Cream Social dress without the sleeves. Since I already knew how to make it I was set to go!

I used fabric I found at JoAnn Fabrics that my fellow Mama, Hillary encouraged me to get - thanks Hillary! It isn't something I would normally pick out but I am SO glad I did. Shanna suggested embellishing the dress with a different fabric band on the bottom, so I went for it. This part made the project a little more difficult, but I love how it turned out and I like trying out new things and learning so it worked! I instantly knew I also wanted to embellish it with one of Jess' Fabric Flowers because, like I posted before I am obsessed!

I finished the dress last night and was so thrilled that the weather cooperated with me - after having so many rainy, cold days we finally have had a stretch of sunny warm days! Perfect for Cupcake to show off my latest creation!! Hope you like it as much as I do.
Perfect day to play in the grass, sporting the Feeling Groovy Dress
Beautiful little girl in a beautiful little dress. Yes I know the Mickey Crocs don't exactly match - she insisted on them. All I cared about was that she was wearing the dress, so I didn't mind!
How cool is she?!? She has all she needs: grapes, sunglasses, & her blankie

Tuesday, April 19, 2011

Wreaths, and Skirts, and Dresses, Oh My!

Hello, Jennifer here! Spring is finally here and after the winter we had in Indiana, I am very excited about sun, warm weather, and Spring craft projects!

I started out welcoming in the Spring with this bright and cheery Spring Wreath.  I was inspired by a tutorial I saw on Craftaholics Anonymous, but decided to add some of these flowers, from the Craft Snob (who I love!) to the wreath as well. I was so please with the results and was so happy I added the Pomela flowers. I loved the variety of styles of flowers in the wreath. I was so happy and excited with the results of the wreath, I even made a second one for my Mom. What a great way to say "hello," to Spring!


Once I received my sewing machine and got the hang of the very basics, I searched my beloved craft blogs far and wide for clothing tutorials that seemed easy enough for me to tackle. I found Dana's tutorial for a Simple Skirt. Simple. Skirt. What could get better?!? How about the fabric she used for the first skirt!! I fell in love. After studying the tutorial, I made my way to Hobby Lobby and excitedly found the same fabric she used for the skirt! I gathered up the rest of the supplies I needed for the project and was very happy to get started. Overall, the skirt was indeed, simple. I am sure I spent much more time than Dana ever has on a skirt like this, but hey I'm just learning so that's alright. I also realized, trying it on Cupcake, it was too short - oops! Cupcake does NOT like being measured, so I blame it on that. It had nothing to do with my excitement to complete the project and not trying it on her before I finalized the skirt. Luckily, I posted my dilemma on Dana's blog and she suggested I just add another layer, so I did and it worked out well! Thanks Dana. I was so excited about this skirt, I created a second, double layer skirt. Adorable! I see many more of these in Cupcake's future...

The Simple Skirt that was way too short!
Cupcake modeling the Simple Skirt after I added fabric so it wasn't so mini!
Cupcake in her double layer Simple Skirt
Just this week, I worked on an Ice Cream Social dress from Craftiness is Not Optional. I absolutely love this blog, by the way! I've browsed her tutorials several times and I love all the adorable clothes she makes for her girls. Her amazing abilities mystify me. It is crazy to think she just comes up with all of this stuff on her own! Because I am just a bit obssessed with Jess and her site, I became a fan of hers on facebook as soon as I saw that she had a page. I posted on her page that was a tad intimidated by her craftiness and wondered what she suggested as a good beginner project and she so nicely encouraged me to try the Ice Cream Social dress. I found the fabric at JoAnns and was set to go! It turned out to be pretty easy, just like she said. Again, I'm sure it took me way longer than it probably takes Jess to make anything, but I am ok with that for now. I did have a few mistakes; didn't sew close enough to the selvage so a little bit of it shows in the back, that's why its the back right?!? and I had to readjust the straps twice! I'm telling you Cupcake does not enjoy being measured. Luckily, it wasn't too hard to get the seam ripper out and readjust the straps. Check her out in the cute new dress. Thanks to Jess for her motivation and help!

I added some rosettes made from an old shirt, that I hot-glued to a pin to the front, I wanted to make the additional decor transferable because I'd also love to add a big yellow bow to the front as well!

I love these little ruffle straps! 


Hmm, What should I do, Where should I go?